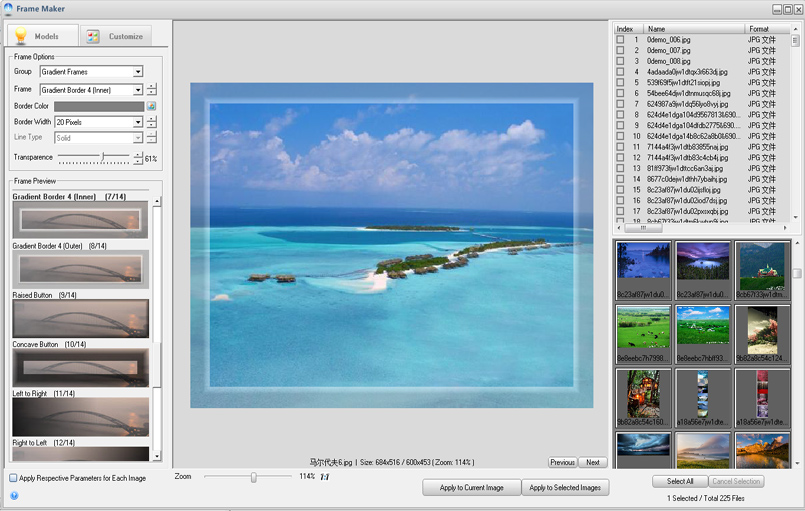
Add Frame Models:
Graphics Converter Pro has about 80 frame models in the package, you can use them for free, but don't use them for commercial use.
1. Open Frame Maker dialog: Choose menu item "Tools > Frame Maker"
2. Drag and drop your photos from Windows Explorer onto the preview box or list box, and select the files which you want to process in batches.
3. Choose a frame group, there are 7 frame groups: Simple Frames, Gradient Frames, Shadow Borders, Image Frames, Lace Patterns, Paper Frames, Blank Frames.
4. Choose a sample frame from the frame list or just click the demo image on the list of frame preview.
Now, you can get the preview of the frame on your image or photo on the preview box.
Tips: Hold down the button
5. Choose Line Color/Border Color/Margin Color for some frames.
6. Choose Line Width/Border Width/Margin Width for some frames.
Tips: Hold down the button
7. If the Line Width <= 3 pixels, you can choose Line Type for Simple Line frame of Simple Frames group.
Tips: Hold down the button
8. Adjust the Transparence/Brightness, just drag the slider.
Tips: Hold down the button
1. Click the "Customize" tab to switch to "Customize" mode.
1. Drag the mouse on the preview box to draw a transparent area.
2. Double-click the frame image to choose the transparent color.
3. Drag the mouse on the frame image to draw a transparent area.
Tips: Hold down the button
Photo Size First: The frame will be resized to fit the photo size.
Frame Size First: The photo will be resized(preserve aspect ratio) to fit the frame size.
For some layout options, you can only choose "Photo Size First".
6. Drag the slider to resize your frame to fit to your photo.
Note: For some modes, this option can not be used.
Tips: Hold down the button
7. Choose the "Layout" option for your frame, there are 6 layout options.
Other Functions or Options:
1. "Apply Respective Parameters for Each Image" option
If you tick this option, it means that Graphics Converter Pro will use respective frame parameters for each image. You can set respective parameters for each image, and Graphics Converter Pro will use the last frame parameters for a new image which has not been set.
If you uncheck the option, Graphics Converter Pro will apply the current frame parameters to all the selected images even if you have set parameters for them. It is useful to add a same frame to multi-photoes in batches.
It will make the frame has the same width both in horizontal or vertical directions.
You can draw an ellipse transparent area by dragging the mouse on the preview box or frame image.
Graphics Converter Pro will apply current frame parameters to current image and save to disk.
Graphics Converter Pro will apply frame parameters to each image and save to disk. If you uncheck the "Apply Respective Parameters for Each Image" option, Graphics Converter Pro will apply the current frame parameters to all the selected images even if you have set parameters for them.