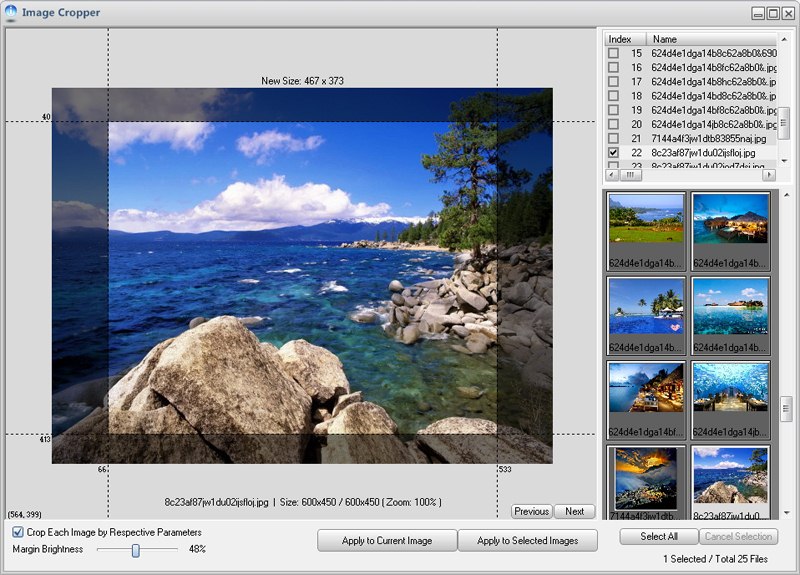
1. Open Image Cropper dialog: Choose menu item "Tools > Image Cropper"
2. Drag and drop your photos from Windows Explorer onto the preview box or list box, and select the files which you want to process in batches.
3. Position or adjust the cropping margins
You have two methods:
Method 1: Hold the left-button, and drag your mouse on the preview box to "draw" a selection box. Graphics Converter Pro will automatically create cropping margins for you.
Method 2: Drag the coordinate lines to adjust each margin easily.
4. Tick "Crop Each Image by Respective Parameters" option
It's a default option, this means that Graphics Converter Pro will use respective cropping parameters for each image. You can set respective parameters for each image, and Graphics Converter Pro will use the last parameters for a new image which has not been set.
If you uncheck the option, Graphics Converter Pro will apply the current cropping parameters to all the selected images even if you have set parameters for them.
5. Click "Apply to Current Image" button
Graphics Converter Pro will apply current cropping parameters to current image and save to disk.
or Click "Apply to Selected Images" button
Graphics Converter Pro will apply cropping parameters to each image and save to disk. If you uncheck the "Crop Each Image by Respective Parameters" option, Graphics Converter Pro will apply the current cropping parameters to all the selected images even if you have set cropping parameters for them.